Fork Painting Flowers
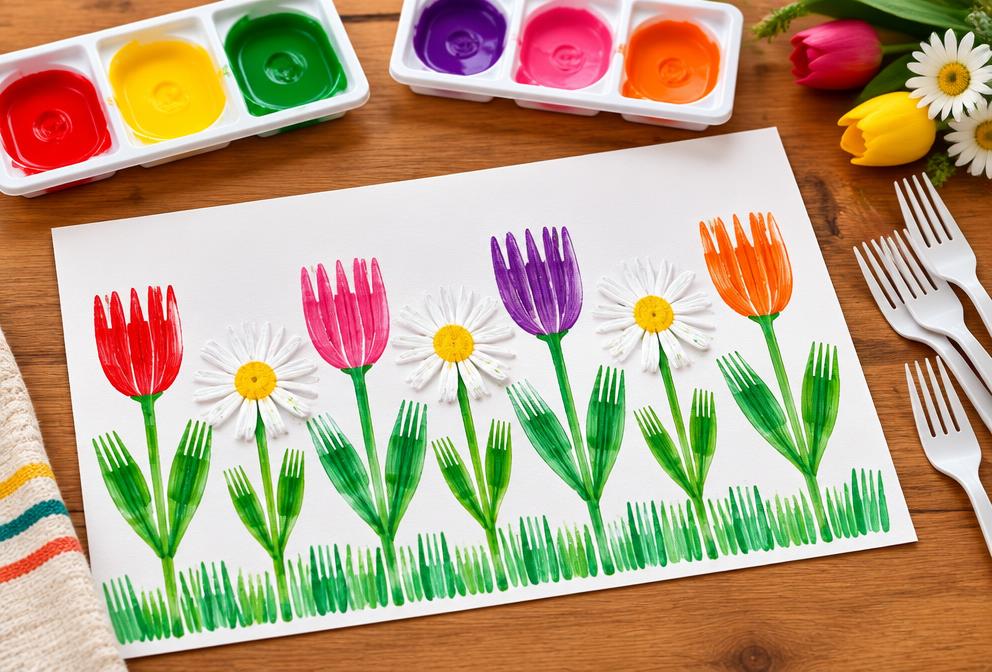
An ordinary dinner fork dipped in paint stamps out a perfect flower shape in one press.
By WonderCraft Kids Editorial Team, Editorial team · Updated 4 September 2026
Fork painting is one of those tricks that feels like magic the first time a child tries it: press a paint-dipped fork onto paper and the tines leave a ring of petals in a single motion. It needs nothing more than paint, paper and cutlery you already own, and it gives even a very young child a flower that looks intentional. Cleanup is just a rinse of the forks under the tap.
What you need
- 2-3 plastic or old metal forks
- Washable paint, 4-5 colours
- Shallow plates for the paint
- Thick paper or card
- A thin paintbrush for stems and leaves
- Green paint or crayon for stems
Step by step
- 1
Pour a thin layer of paint onto a plate for each colour you want to use.
- 2
Dip the back of a fork's tines into the paint so a thin coat covers them.
- 3
Press the fork firmly onto the paper and lift it straight up to leave a flower-shaped print.
- 4
Rinse the fork between colours or use a separate fork for each colour.
- 5
Once the page has several flower prints, use a brush to add green stems and leaves underneath.
- 6
Leave flat to dry for at least an hour before moving the paper.
What kids learn
Cause and effect
Pressing harder or lighter changes how much paint transfers, which gives children a chance to test and compare results.
Shape awareness
Noticing that the fork always makes the same ring of petals can help children practise recognising repeated shapes.
Composition
Deciding where each flower goes and adding stems afterwards encourages early picture planning.
Make it easier
Use one fork and one colour so a younger child can focus purely on the press-and-lift motion.
Make it more challenging
Ask them to build a whole garden scene with different flower colours, heights and added grass.
Safety and supervision
- Forks used for painting should not go back into the kitchen drawer for eating; keep a dedicated craft set.
- Use paint labelled non-toxic and washable.
- Supervise young children with fork tines, as pressing too hard can mark skin or furniture.
Adult supervision is required for every activity on this site. Read our full child safety guidelines.
Pin this activity
A 2:3 vertical graphic, sized 1000×1500 for Pinterest. Save it for later or share it with another parent.
wondercraftkids.com
Fork Painting Flowers
Ages 3-7 · 20 min · low mess
Ages 3–7 · Low mess
Suggested pin description
Fork Painting Flowers: An ordinary dinner fork dipped in paint stamps out a perfect flower shape in one press. Ages 3–7, 25 minutes total, low mess. Full step-by-step instructions and a materials list at WonderCraft Kids.
Free download
Get the FREE 20 Screen-Free Activities Pack
Twenty printable activity cards for ages 2–8, sorted by time and mess level. One email, no spam, unsubscribe any time.
Frequently asked questions
Does the fork need to be a certain size?+
A standard dinner fork works well. Smaller forks give a daintier flower for younger children's hands.
How do I stop the print smudging?+
Lift the fork straight up rather than dragging it sideways, and avoid touching the wet print afterwards.