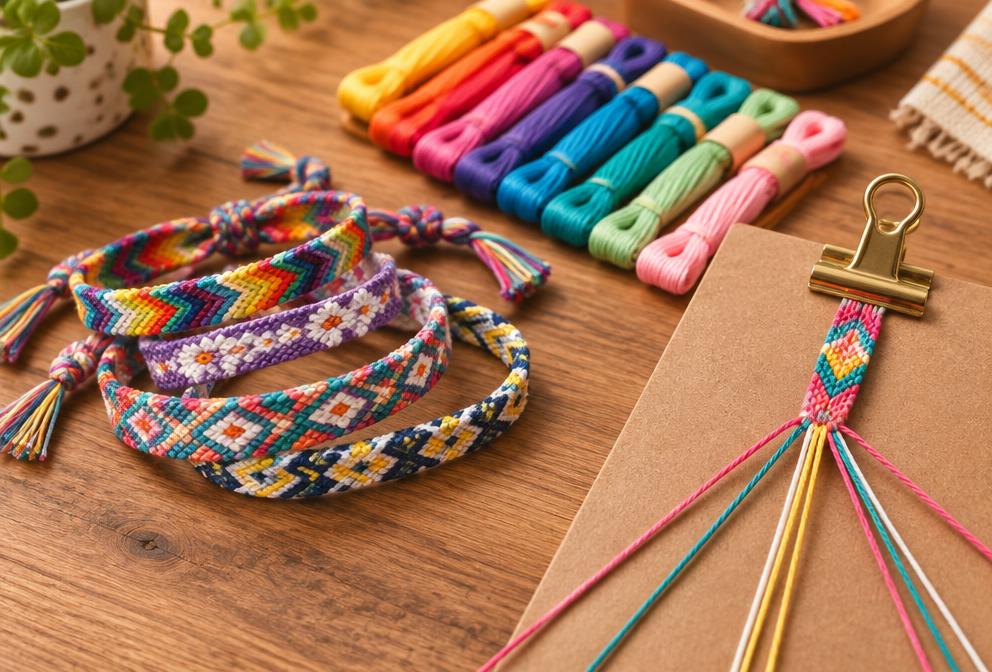
Friendship Bracelet Making
Embroidery floss and a simple knot pattern turn into a bracelet children can give to a friend.
By WonderCraft Kids Editorial Team, Editorial team · Updated 2 September 2026
Friendship bracelets are the classic quiet-hands craft: a board or clipboard holds the threads taut while small fingers repeat the same two knots over and over. The first bracelet is slow and a bit wonky, but by the third one most children have the rhythm and can chat or watch something while their hands keep working. Cleanup is just coiling the leftover floss back onto its card.
What you need
- Embroidery floss, 4-6 colours
- A clipboard, bracelet board, or safety pin
- Scissors (adult use)
- Sticky tape
- A ruler
- A small clasp or extra floss for ties (optional)
Step by step
- 1
Cut six lengths of floss, each about a metre long, mixing colours as you like.
- 2
Knot the strands together at one end and tape or pin the knot to a clipboard.
- 3
Spread the strands out and show the basic forward knot: take the left strand over the one beside it and pull snug.
- 4
Repeat the same knot across the row before starting the next row.
- 5
Check the pattern every few rows and unpick any knot that has slipped out of order.
- 6
When the bracelet is long enough to wrap the wrist, knot the ends together and trim.
What kids learn
Fine motor precision
Holding tension on one strand while knotting another can help children practise the pincer grip used later in handwriting.
Sequencing and patience
Following the same knot in the same order gives children a chance to build a rhythm and notice their own mistakes.
Colour and pattern planning
Choosing which colours go where is an early lesson in planning a design before starting it.
Make it easier
Use just two colours and a simple twist braid instead of knots — three strands over each other still looks finished.
Make it more challenging
Try a chevron or diamond pattern with eight strands and a printed pattern chart to follow.
Safety and supervision
- Adults should do all cutting for children under five.
- Tie loosely enough to slide the bracelet over the hand, or use a clasp, so it never needs cutting off a wrist.
- Keep long floss lengths away from very young siblings, who can get them wound around fingers or necks.
Adult supervision is required for every activity on this site. Read our full child safety guidelines.
Pin this activity
A 2:3 vertical graphic, sized 1000×1500 for Pinterest. Save it for later or share it with another parent.
wondercraftkids.com
Friendship Bracelet Making
Ages 5-8 · 35 min · no mess
Ages 5+ · No mess
Suggested pin description
Friendship Bracelet Making: Embroidery floss and a simple knot pattern turn into a bracelet children can give to a friend. Ages 5+, 45 minutes total, no mess. Full step-by-step instructions and a materials list at WonderCraft Kids.
Free download
Get the FREE 20 Screen-Free Activities Pack
Twenty printable activity cards for ages 2–8, sorted by time and mess level. One email, no spam, unsubscribe any time.
Frequently asked questions
What age can start friendship bracelets?+
Around five or six with help holding the board; most children manage the knots independently from about seven.
My child keeps losing the pattern, what helps?+
Slow down to one knot at a time and check colour order after every row rather than every bracelet.