Paper Cup Flowers
Snipped and folded paper cups turn into simple flowers that stand up on their own in a jar.
By WonderCraft Kids Editorial Team, Editorial team · Updated 10 September 2026
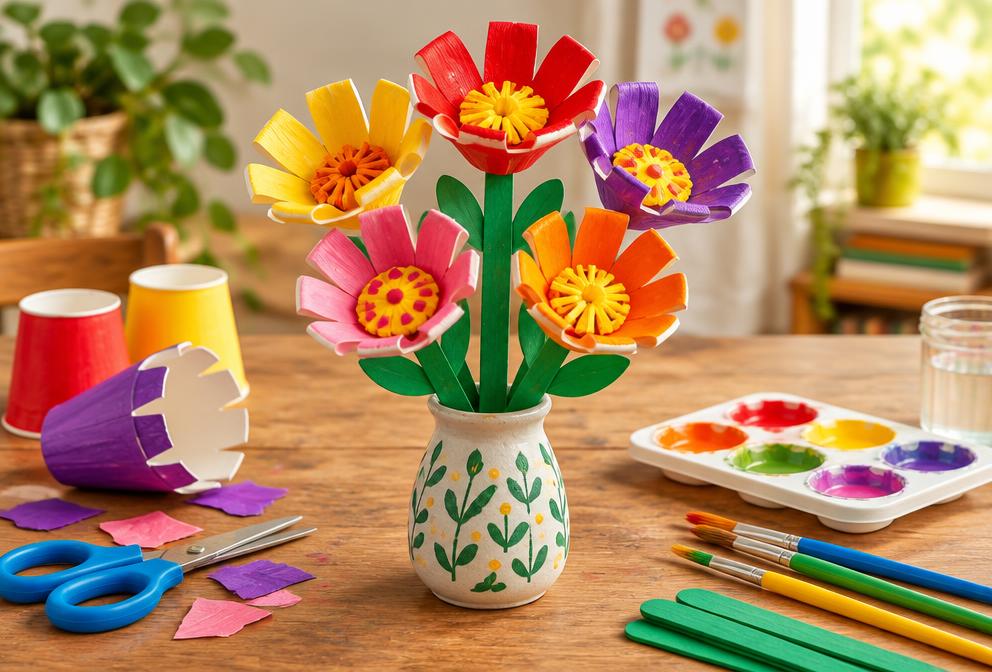
Paper cup flowers take an ordinary disposable cup and, with a few snips and some colouring, turn it into a flower that stands upright without any extra support. The snipping motion is good scissor practice, and the finished flowers are sturdy enough to survive being carried around the house or given as a small gift. A batch of five or six makes a cheerful bunch for the kitchen table.
What you need
- Paper or plastic cups, one per flower
- Scissors (adult help for younger children)
- Washable paint or coloured markers
- Green pipe cleaners or drinking straws for stems
- Sticky tape
- A small pot of dry rice, sand or play dough to hold the stems upright (optional)
Step by step
- 1
Turn the cup upside down and snip from the rim towards the base, stopping about two centimetres before the bottom, to make eight to ten petal strips.
- 2
Curl or fold each strip outward gently to shape the petals.
- 3
Paint or colour the petals and the centre of the cup while it is still upside down.
- 4
Poke a small hole in the base of the cup and thread a pipe cleaner or straw through for a stem.
- 5
Secure the stem in place from the inside with a knot or a piece of tape.
- 6
Stand the finished flowers in a jar of rice or sand, or simply lay them flat if you skip the stem.
What kids learn
Fine motor control
Careful snipping along a line without cutting too far can help children practise scissor precision.
Following a sequence
Working through cutting, curling, colouring and assembling in order gives children a chance to practise multi-step tasks.
Understanding structure
Working out how to make the flower stand upright introduces simple ideas about balance and support.
Make it easier
Pre-cut the petal strips so a younger child only needs to curl them and add colour.
Make it more challenging
Make a whole bunch in different colours and add leaves cut from green paper along the stem.
Safety and supervision
- Adults should do the cutting for under-fives, as the snips need to stop short of the base without slipping.
- Supervise poking the hole for the stem so fingers stay clear of the scissor or skewer point.
- Use washable paint if painting the cups.
Adult supervision is required for every activity on this site. Read our full child safety guidelines.
Pin this activity
A 2:3 vertical graphic, sized 1000×1500 for Pinterest. Save it for later or share it with another parent.
wondercraftkids.com
Paper Cup Flowers
Ages 4-8 · 25 min · low mess
Ages 4+ · Low mess
Suggested pin description
Paper Cup Flowers: Snipped and folded paper cups turn into simple flowers that stand up on their own in a jar. Ages 4+, 30 minutes total, low mess. Full step-by-step instructions and a materials list at WonderCraft Kids.
Free download
Get the FREE 20 Screen-Free Activities Pack
Twenty printable activity cards for ages 2–8, sorted by time and mess level. One email, no spam, unsubscribe any time.
Frequently asked questions
Do plastic or paper cups work better?+
Paper cups hold paint and folds better; plastic cups need marker pen instead of paint since paint can bead and slide off.
How do we make the flowers stand up without rice or sand?+
Push the stems into a lump of play dough or modelling clay pressed into the base of a jar.