Bubble Wrap Printing
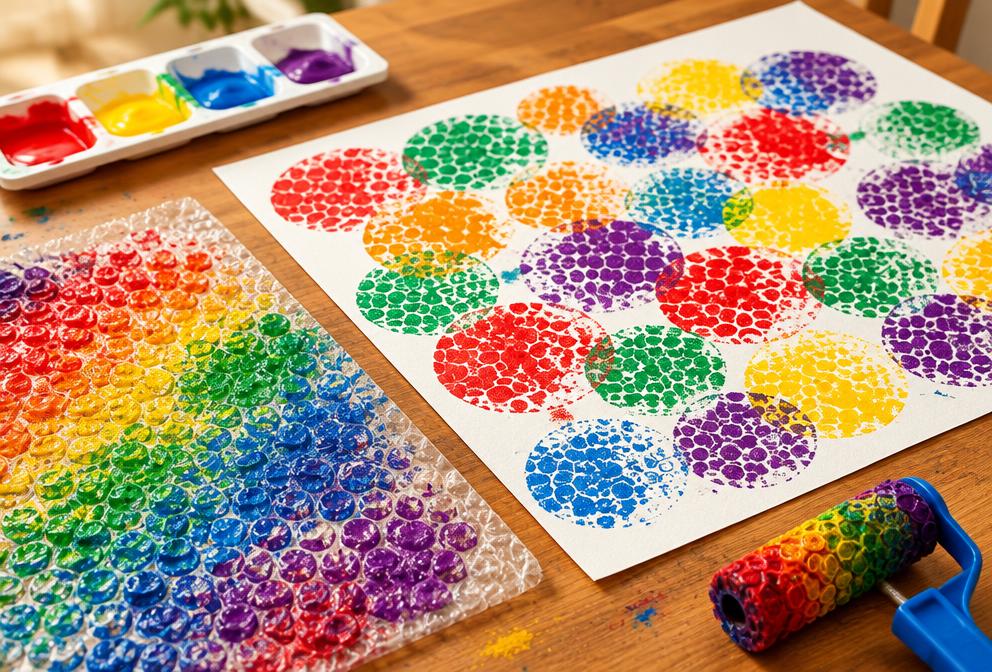
Leftover bubble wrap painted and pressed onto paper leaves a honeycomb texture children love repeating.
By WonderCraft Kids Editorial Team, Editorial team · Updated 6 September 2026
If a parcel has just arrived, the bubble wrap padding it came in is the star of this activity rather than the packaging. Painted and pressed onto paper, it leaves a satisfying dotted, honeycomb texture that looks different every time depending on how hard it is pressed. It is a good way to reuse packaging material, and the popping sound of the bubbles adds its own appeal even before the paint comes out.
What you need
- A sheet of bubble wrap, cut into hand-sized pieces
- Washable paint, 3-4 colours
- A paint roller or wide brush
- Thick paper or card
- Sticky tape (to fix bubble wrap to a block, optional)
- Wipe-clean tablecloth or mat
Step by step
- 1
Tape a piece of bubble wrap bubble-side up to a small block of wood or a jar lid for an easier handle, or use it flat.
- 2
Roll or brush a thin layer of paint over the bubbled surface.
- 3
Press the painted side firmly onto the paper and hold for a couple of seconds.
- 4
Peel it back slowly to reveal the honeycomb print, then re-paint and press again elsewhere.
- 5
Try overlapping colours once the first layer is dry to build a layered effect.
- 6
Leave the finished print flat to dry fully before handling it.
What kids learn
Texture exploration
Feeling the bumpy bubble wrap before and after painting gives children a chance to compare textures.
Predicting outcomes
Guessing what the print will look like before peeling back the wrap can help children practise cause-and-effect thinking.
Reuse and resourcefulness
Turning packaging into a craft tool is a gentle, concrete way to introduce the idea of reusing materials.
Make it easier
Use one large piece of bubble wrap and one colour, letting a toddler press it anywhere on the page.
Make it more challenging
Cut the bubble wrap into shapes first, so each print contributes to a picture such as a tree or a hedgehog.
Safety and supervision
- Keep small offcuts of bubble wrap away from babies and toddlers who mouth objects, as popped bubbles can be a choking hazard.
- Use paint labelled non-toxic and washable.
- Supervise scissor use if cutting the bubble wrap into shapes; adults should cut for under-fives.
Adult supervision is required for every activity on this site. Read our full child safety guidelines.
Pin this activity
A 2:3 vertical graphic, sized 1000×1500 for Pinterest. Save it for later or share it with another parent.
wondercraftkids.com
Bubble Wrap Printing
Ages 2-6 · 20 min · reuses packaging
Ages 2–6 · Some mess
Suggested pin description
Bubble Wrap Printing: Leftover bubble wrap painted and pressed onto paper leaves a honeycomb texture children love repeating. Ages 2–6, 25 minutes total, some mess. Full step-by-step instructions and a materials list at WonderCraft Kids.
Free download
Get the FREE 20 Screen-Free Activities Pack
Twenty printable activity cards for ages 2–8, sorted by time and mess level. One email, no spam, unsubscribe any time.
Frequently asked questions
Can I reuse the same bubble wrap for multiple prints?+
Yes, a rinsed and dried piece can be reused several times, though the print softens slightly as bubbles get flattened.
What if we do not have bubble wrap at home?+
Any offcut from a recent delivery works, or you can ask a local shop that receives fragile deliveries for a spare sheet.