Ice Painting
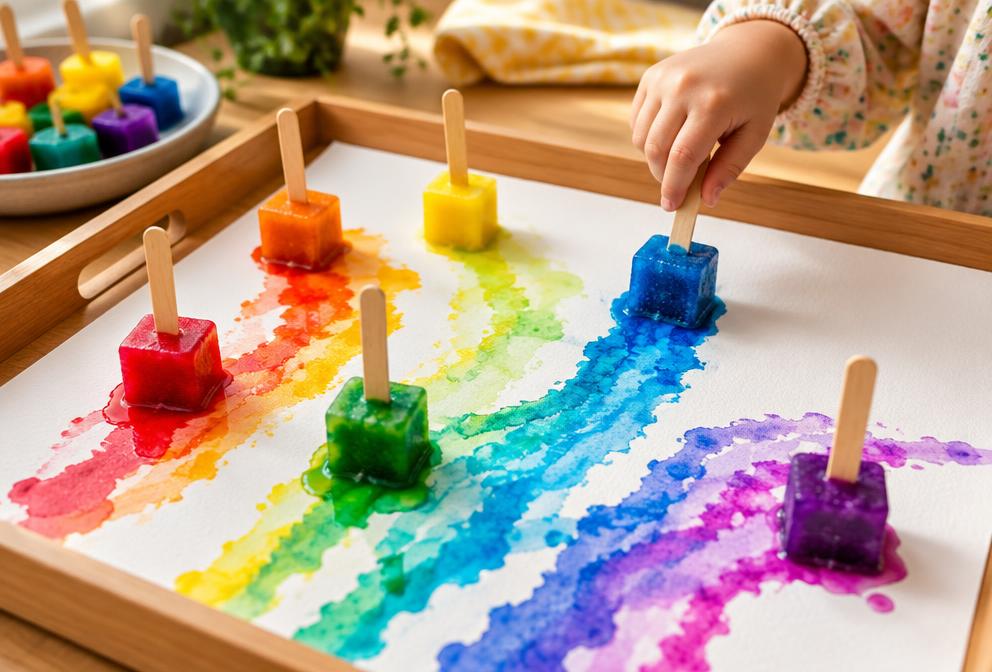
Frozen paint pops on sticks melt into cool, streaky colour as children drag them across paper.
By WonderCraft Kids Editorial Team, Editorial team · Updated 5 September 2026
Ice painting turns ordinary paint into something with its own slow-moving behaviour: it melts, drips and blends as it is dragged across the page, and children cannot fully control the result, which is exactly what makes it interesting. It needs a freezer overnight and almost no cleanup skill beyond a wipeable table, since the paint stays contained in the ice until it melts.
What you need
- An ice cube tray
- Washable paint, 4-6 colours
- Water to thin the paint slightly
- Wooden lolly sticks or plastic spoons
- Thick paper or card
- A tray or wipeable mat
Step by step
- 1
Mix each paint colour with a splash of water so it pours easily.
- 2
Pour a different colour into each section of the ice cube tray.
- 3
Stand a lolly stick upright in each section, then freeze for at least six hours or overnight.
- 4
Pop the frozen paint cubes out just before you start, so they are still solid.
- 5
Hold a cube by its stick and drag it slowly across the paper, pressing gently as it melts.
- 6
Swap colours often and let cubes overlap so colours blend where they meet.
- 7
Leave the finished painting flat to dry, since it will be wetter than usual paint.
What kids learn
Early science observation
Watching solid ice turn to liquid paint gives a hands-on, visible example of a state change.
Colour mixing
Overlapping melting colours shows blending happening gradually rather than all at once with a brush.
Sensory tolerance
Holding something cold and dripping for a sustained time can help children practise coping with an unusual sensation.
Make it easier
Freeze just two colours and give your child one large sheet of paper, so there is less choice and more time on each cube.
Make it more challenging
Ask your child to predict which two colours will make green or purple before they start, then check their guess as the cubes melt together.
Safety and supervision
- Ice cubes are cold enough to be uncomfortable held bare-handed for long, so keep the stick handle long enough to grip comfortably.
- The paint is not for tasting, even though it looks a little like ice lollies.
- Adults handle the freezer and any unmoulding that needs force.
Adult supervision is required for every activity on this site. Read our full child safety guidelines.
Pin this activity
A 2:3 vertical graphic, sized 1000×1500 for Pinterest. Save it for later or share it with another parent.
wondercraftkids.com
Ice Painting for Kids
Ages 2-6 · 20 min · some mess
Ages 2–6 · Some mess
Suggested pin description
Ice Painting for Kids: Frozen paint pops on sticks melt into cool, streaky colour as children drag them across paper. Ages 2–6, 30 minutes total, some mess. Full step-by-step instructions and a materials list at WonderCraft Kids.
Free download
Get the FREE 20 Screen-Free Activities Pack
Twenty printable activity cards for ages 2–8, sorted by time and mess level. One email, no spam, unsubscribe any time.
Frequently asked questions
How long does it take for the paint cubes to freeze?+
Around six hours in a standard freezer, so this works best made the night before or first thing in the morning for afternoon use.
Can we reuse melted paint cubes?+
Once melted they cannot be refrozen into the same neat shape, but leftover liquid paint can be poured straight into a tray and painted with as normal.