Paper Quilling for Kids
Rolling thin paper strips into tight coils and gluing them into shapes to build a small paper picture.
By WonderCraft Kids Editorial Team, Editorial team · Updated 15 September 2026
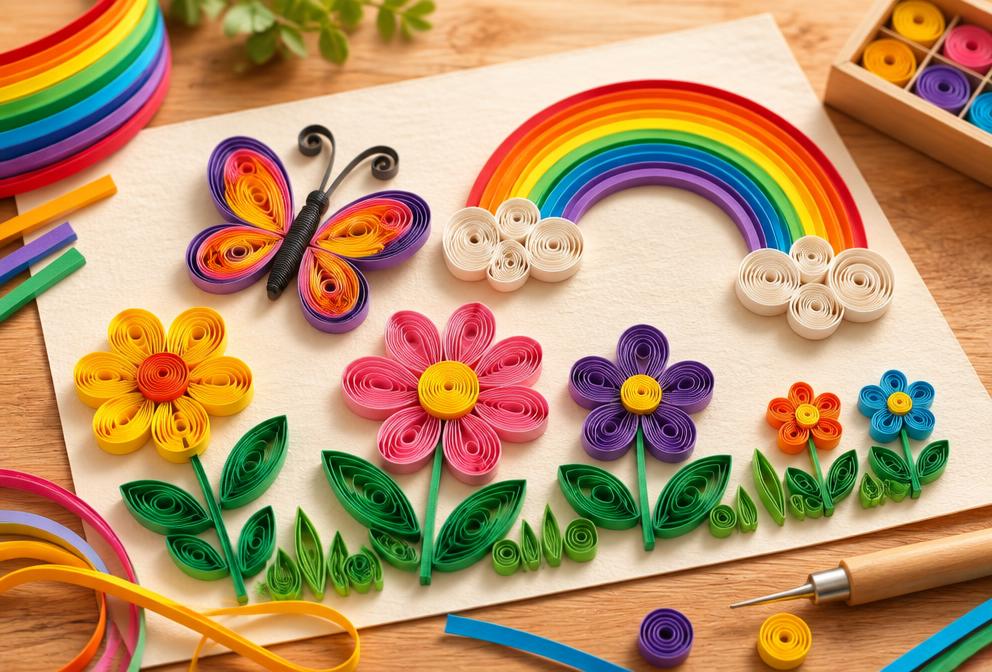
Paper quilling is the art of rolling narrow paper strips into coils, then pinching and gluing them into shapes like petals, spirals and hearts. A simple slotted tool does the rolling so small fingers do not need to pinch paper tightly for long, and the coils glue flat onto card to build up a picture. It is precise, quiet work, well suited to a child who likes seeing a design come together piece by piece.
What you need
- Pre-cut quilling paper strips, or paper cut into 5mm strips
- A slotted quilling tool or a toothpick
- PVA glue and a small brush or cocktail stick for applying it
- A sheet of card as the base
- Tweezers for placing small coils
- A pencil for sketching a simple design first
Step by step
- 1
Sketch a simple outline on the card, such as a flower, sun or a few basic shapes.
- 2
Slot one end of a paper strip into the quilling tool and wind it round tightly to form a tight coil.
- 3
Slide the coil off the tool and let it relax slightly before dabbing a touch of glue on the loose end to hold it.
- 4
Pinch the coil between two fingers to shape it into a petal, teardrop or other simple form.
- 5
Dab a little glue on the base of the shape and place it onto the sketched outline using tweezers.
- 6
Repeat with more coils in different colours until the design is filled in, then leave flat to dry.
What kids learn
Fine motor precision
Winding and pinching narrow paper strips can help children practise very controlled, small-scale hand movements.
Working from a plan
Sketching a design first and filling it in with coils gives children a chance to practise following their own plan through to completion.
Patience with a repetitive task
Making many similar coils for one picture gives children a chance to practise sticking with a repetitive task for a longer result.
Make it easier
Use a large, simple outline like a single flower with only four or five petals, and pre-roll a few coils for your child to place and glue.
Make it more challenging
Try a design with several different coil shapes such as spirals, hearts and marquise shapes combined in one picture.
Safety and supervision
- Small paper coils can be a choking hazard for children who still mouth objects.
- PVA glue is generally safe but should not be eaten; supervise use around younger children.
- The pointed quilling tool needs supervision with younger or less careful hands.
Adult supervision is required for every activity on this site. Read our full child safety guidelines.
Pin this activity
A 2:3 vertical graphic, sized 1000×1500 for Pinterest. Save it for later or share it with another parent.
wondercraftkids.com
Paper Quilling for Kids
Ages 6-8 · 30 min · low mess
Ages 6+ · Low mess
Suggested pin description
Paper Quilling for Kids: Rolling thin paper strips into tight coils and gluing them into shapes to build a small paper picture. Ages 6+, 40 minutes total, low mess. Full step-by-step instructions and a materials list at WonderCraft Kids.
Free download
Get the FREE 20 Screen-Free Activities Pack
Twenty printable activity cards for ages 2–8, sorted by time and mess level. One email, no spam, unsubscribe any time.
Frequently asked questions
Do we need special quilling paper?+
Pre-cut quilling strips are easier to start with, but ordinary paper cut into thin, even strips works nearly as well.
Why do the coils keep springing open?+
This is normal; a coil naturally loosens a little once released, which is why gluing the loose end before it fully unwinds matters.